Placement is free, takes two minutes to get right, and makes a bigger difference than the next two panels you buy.
SMBy Scooter M.Published October 3, 2026Prices verified October 3, 2026
The short answer
Treat the first reflection points first, then the wall directly behind you, then the wall behind your screen, then the ceiling above the desk. The first reflection points are the spots where sound from your mouth bounces exactly once before reaching your microphone, and a panel there does several times the work of the same panel in a corner. You find them in two minutes with a hand mirror and a friend.
Why placement matters more than people expect
Absorption is not evenly useful across a room. A sound wave leaving your mouth reaches a microphone by two routes: directly, and after bouncing off a surface. The bounced version arrives a few milliseconds later and slightly changed, and your ear and the microphone combine the two.
It is those early reflections, arriving within roughly 20 milliseconds, that make a room sound hollow and a voice sound distant. Later reflections contribute to the general reverberation, which matters less for speech.
So a panel positioned to intercept a first reflection removes energy from the part of the sound field doing the most damage. The same panel on the wall behind a bookcase intercepts a late reflection that was going to decay anyway. Same product, same money, several times the effect.
The mirror trick, step by step
01Sit where you actually work, in your normal posture, at the position you take calls from. This matters: the reflection points move if you move.
02Have someone slide a hand mirror flat along the side wall at roughly the height of your head, while you look at it without moving.
03Mark every spot where you can see your own face, specifically your mouth. That spot is where sound from your mouth bounces once before reaching your ear and your microphone.
04Repeat on the opposite wall, and on the wall behind your screen.
05Place panels centered on those marks. A 24 by 48 in panel centered on a reflection point covers it with room to spare.
In a typical home office there are two to four such points, which is two to four panels doing the heaviest lifting in the whole installation.
The order to treat surfaces in
Priority order, and why
Priority
Surface
Why it matters
Roughly
1
First reflection points on the side walls
Intercepts the early reflections that smear speech
2 to 4 panels
2
The wall directly behind your head
Sound goes backwards from your mouth too, and comes straight back at the microphone
1 to 2 panels
3
The wall behind your screen
Reflects your voice back toward you, and is usually the camera background anyway
2 to 3 panels
4
Ceiling above the desk
A hard ceiling is a large untreated reflector directly overhead
1 to 2 panels or a suspended baffle
5
Corners
Low-frequency energy accumulates here. Only worth treating with thick material
Optional
6
Remaining wall area
General reverberation. Diminishing returns
Fill to your target coverage
Our ordering, from the mechanism rather than from measurement. If you only buy four panels, spend them on priorities 1 and 2.
Height, and the mistake almost everyone makes
Panels should be centered at roughly seated ear height, which is about 42 to 48 in from the floor. That is lower than instinct suggests, and the common error is hanging panels at picture height, around 60 in, where they look right and intercept nothing.
If the panels have to look like wall art for the room to be acceptable, the compromise is to use a taller panel - a 48 in panel hung vertically with its center at 48 in covers from 24 to 72 in and catches both.
Spacing: do not tile the wall
A continuous wall of panel is not meaningfully better than the same area spread out, and it costs more to look worse. Distributing panels with gaps between them treats more of the room's modes and uses less material.
A practical rule: leave at least a panel's width between panels on the general wall area, and treat the reflection points as a continuous patch. That gets you coverage distribution and a pattern that reads as deliberate.
Three placements that are usually wasted
Behind furniture. A panel behind a bookcase or a tall cabinet is absorbing a reflection that was already being scattered and absorbed by the books.
Above about 7 ft on a wall, unless you are treating a tall room deliberately. The useful reflections are at and below standing head height.
On the floor side of a desk. The desk surface itself is a significant reflector and you cannot treat it, which is a limitation worth knowing rather than working around.
#
Product
Best for
Score
Price
01
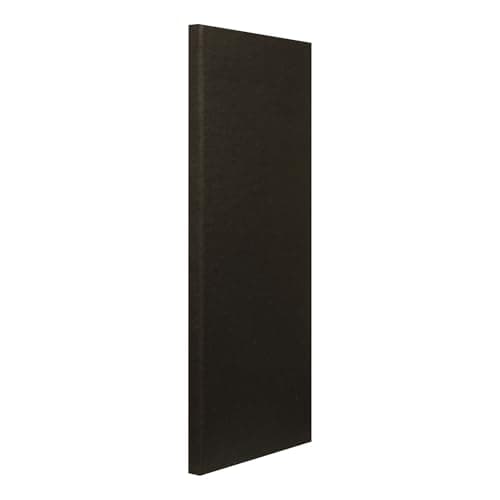
ATS Acoustics Beveled Edge Panel, 24 x 48 x 2 inThe same NRC 1.0 mineral-wool build as the Sona panel in jute burlap with a beveled edge, for about 16 dollars less.
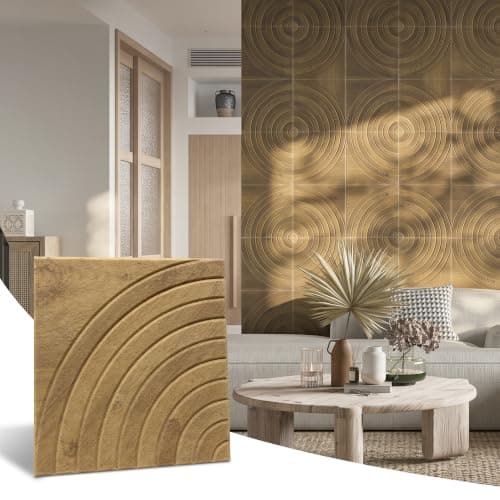
INNO STICKERS PET Felt Tiles, 16-Pack 11.8 x 11.8 inPublishes an NRC range of 0.6 to 0.85 rather than a single flattering number, which is the most honest absorption statement on this page.
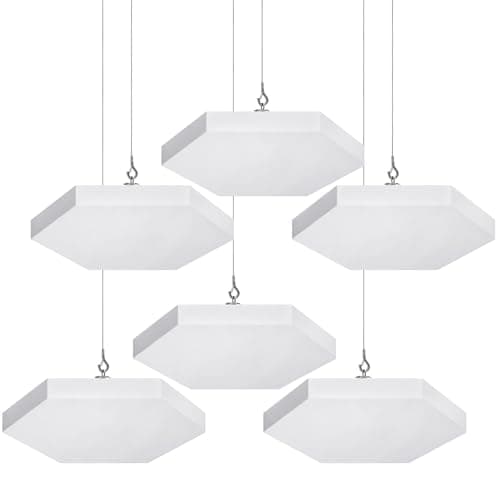
ElaraBerry Hexagon Ceiling Panels, 6-Pack Coated FiberglassCoated fiberglass at a published 120 kg/m3, hung from the ceiling so both faces work. It is the only product here that absorbs on two sides.
Scores are ours, from the published rubric on our methodology page. They are editorial judgments about published specifications, not test results — we have not handled these units.
01/ATS Acoustics
Beveled Edge Panel, 24 x 48 x 2 in
Best measured panel under 80 dollars
8.4/ 10
The same NRC 1.0 mineral-wool build as the Sona panel in jute burlap with a beveled edge, for about 16 dollars less.
The same NRC 1.0 mineral-wool build as the Sona panel in jute burlap with a beveled edge, for about 16 dollars less.
Published specification
Panel size
24 x 48 x 2 in
ATS Acoustics published specification
Coverage per panel
8 sq ft
Our arithmetic from the published panel size
NRC
1.0 (publisher states out of 1)
ATS Acoustics published specification
Core
Mineral wool, solid wood internal frame, full wood back
ATS Acoustics published specification
Fabric
100% jute burlap
ATS Acoustics published specification
Weight
8.25 lb
Listing published specification
What the specs are good for
Same published NRC 1.0 and same mineral wool core as the Sona panel, for less money
Beveled edge reads as a deliberate architectural element rather than a studio accessory
Full wood back means it sits flat against drywall without bowing
What they are not
Burlap is a coarser, more rustic texture than the Sona fabric and shows dust
The listing does not restate the ASTM E84 fire rating that the Sona panel carries
Still a single panel per purchase
Skip this if
Skip this if the room is a living space where the panel has to look soft and finished. Burlap looks like what it is, and in a shared room that reads as equipment.
Who it is for. Anyone who wants the measured build and does not care that the fabric is agricultural.
Publishes an NRC range of 0.6 to 0.85 rather than a single flattering number, which is the most honest absorption statement on this page.
Publishes an NRC range of 0.6 to 0.85 rather than a single flattering number, which is the most honest absorption statement on this page.
Published specification
Tile size
11.8 x 11.8 x 0.4 in, 16 tiles
INNO STICKERS published specification
Coverage
15.5 sq ft total
INNO STICKERS published specification
NRC
0.6 to 0.85, stated as a range (no test standard named)
INNO STICKERS published specification
Material
Recycled PET felt
INNO STICKERS published specification
Mounting
96 adhesive tabs supplied; permanent install needs extra adhesive
INNO STICKERS published specification
What the specs are good for
A published RANGE instead of a single best-case number, which is how absorption actually behaves across frequency
Small tiles let you put absorption exactly where the reflection is, instead of covering a whole wall
Adhesive tabs are removable, so this is the least committal option here
Moisture-resistant and vacuumable
What they are not
15.5 sq ft is a spot treatment, not a room treatment
Adhesive tabs are explicitly described as temporary; a permanent install needs adhesive you buy separately
16 small tiles means 16 alignment decisions and a grid that is obvious when it is slightly off
Skip this if
Skip this if you need more than about 16 sq ft. Buying three boxes to cover a wall costs more per square foot than the 10-pack of large panels above and takes four times as long to hang.
Who it is for. Someone with one bad reflection, a rented wall, and no appetite for a project.
Coated fiberglass at a published 120 kg/m3, hung from the ceiling so both faces work. It is the only product here that absorbs on two sides.
Coated fiberglass at a published 120 kg/m3, hung from the ceiling so both faces work. It is the only product here that absorbs on two sides.
Published specification
Panel size
14.2 x 12.3 x 1.2 in, 6 panels
ElaraBerry published specification
Density
120 kg/m3 coated fiberglass
ElaraBerry published specification
Absorption
Described as effective for mid to high frequencies; no NRC published
Absence confirmed against the published specification
Weight
6.39 lb for the pack
Listing published specification
Supplied with
12 stainless steel cables, fixings, gloves
ElaraBerry published specification
Mounting
Suspended from the ceiling, both faces exposed
ElaraBerry published specification
What the specs are good for
Suspended mounting exposes both faces, which is a genuine physical advantage no wall panel has
Publishes a real density figure at 120 kg/m3, and density is what thin panels lack
1.2 in thick, roughly three times the felt tiles here
Frees up wall space entirely, which matters in a small room with windows and a door
What they are not
No NRC published, so the dual-sided advantage cannot be quantified
Fiberglass, coated or not: the listing itself tells you to wear a mask, goggles and gloves to install it
Needs ceiling fixings, which is a harder job than a wall and impossible in most rentals
The listing warns about odor and advises ventilating before use
Skip this if
Skip this if you rent, if your ceiling is concrete, or if anyone in the house is sensitive to fiberglass. Ceiling work is the least forgiving install in this whole category.
Who it is for. An owner-occupier in a small hard-surfaced room who has run out of usable wall.
Three options, and the choice is usually made for you by the wall.
Screws and a template. The most secure, needed for heavier panels like the 8.25 lb ATS units. Not a rental option.
Adhesive. Works on smooth, clean, sound walls only. Textured, chalky or freshly painted surfaces will drop a panel about three weeks later, often taking paint with it.
Impaling clips. Used by some fiberglass panels. They still need adhesive or a fixing behind them, so they are not a hang-and-go answer.
One genuine acoustic note on mounting: a panel mounted with an air gap behind it absorbs lower frequencies than the same panel flat against the wall. A 1 to 2 in gap is a free improvement if your mounting method allows it, and it is the one installation detail that changes performance rather than appearance.
Where should acoustic panels go in a home office?+
First reflection points on the side walls, then the wall directly behind your head, then the wall behind your screen, then the ceiling above the desk. If you only have four panels, spend them on the reflection points and the wall behind you.
How do I find the first reflection points?+
Sit where you work and have someone slide a hand mirror along the wall at head height. Every spot where you can see your own mouth from your seated position is a first reflection point. There are usually two to four in a normal office.
What height should acoustic panels be hung at?+
Centered at about 42 to 48 in from the floor, which is seated ear height. The common mistake is hanging them at picture height around 60 in, where they look right and intercept almost nothing.
Should acoustic panels be spaced out or together?+
Spread out, with at least a panel's width between them on general wall area, and treated as a continuous patch at the reflection points. A tiled wall of panel is not meaningfully better than the same area distributed, and it costs more.
Does an air gap behind an acoustic panel help?+
Yes. A panel mounted with a 1 to 2 in gap behind it absorbs lower frequencies than the same panel flat against the wall. It is the one mounting detail that changes performance rather than appearance, and it costs nothing if your fixing method allows it.
Sources
Where these numbers came from
We have not handled any of these products. Every figure on this page is either the manufacturer's own published specification, named as such, or our arithmetic from those figures, shown so you can check it. Prices come from Amazon through our price layer and carry the date they were verified.
Amazon product listings, retrieved 2026-10-03
Published specifications, dimensions, materials and manufacturer claims were read from each product's own listing data. Prices and availability refresh daily and carry their verification date on the page.
The full published method, and an explicit statement of what a specs-only approach cannot tell you.
ASTM C423 — Standard Test Method for Sound Absorption and Sound Absorption Coefficients by the Reverberation Room Method
The governing test method behind any NRC figure. We name it where a manufacturer publishes an NRC so you know what the number is a result of. We have not performed this test and we do not restate anyone's NRC as our own measurement.